You want to make sure users don’t just sign up but stick around, right? 86% of customers say they’d be more loyal if a company offered solid onboarding and ongoing education. Often, poor onboarding makes users bounce before they even get the hang of things, which means lost chances to get them hooked on your product. If you’ve ever felt frustrated when users drop off before they truly understand your product’s value, you’re not alone. As a product manager, you aim to turn “What is this?” into “I love this!”
That’s why we’ve compiled seven top examples of interactive software walkthroughs to show how to keep users engaged and excited. Let’s dive in and see how the pros do it!
Short on time? Jump straight to Product Fruits 🍇 and start designing your first onboarding walkthrough now with a free 14-day trial!
Best Interactive Software Walkthroughs – Examples
A well-crafted interactive software walkthrough can turn a first-time user into an engaged, loyal customer. Walkthroughs guide users through essential product features, anticipating and answering questions while making the learning process intuitive.
Here are some outstanding examples of brands that have mastered their software walkthroughs. Discover them to get inspired about crafting user onboarding flow for your product. ⤵️
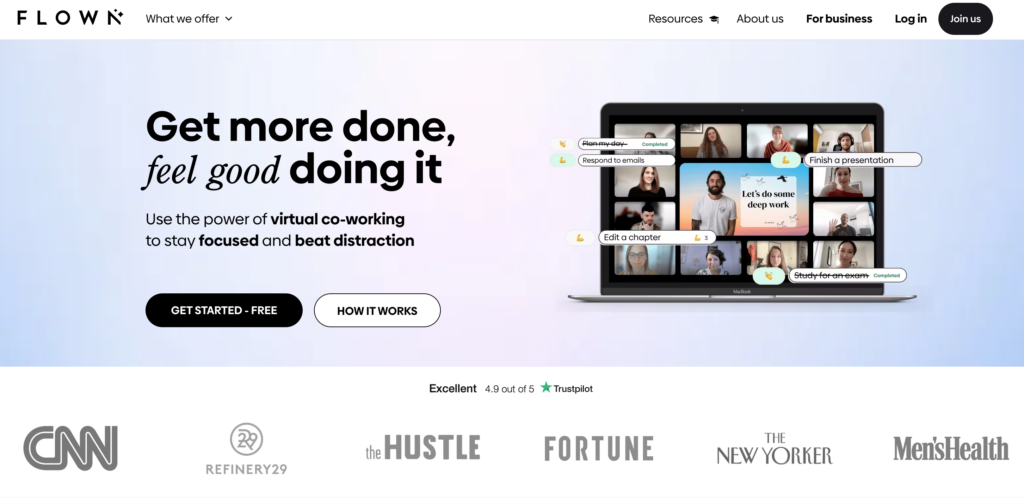
1. Interactive software walkthrough by FLOWN
FLOWN is a global virtual community and co-working platform for remote workers. It aims to enhance productivity and work quality through themed group sessions, mentoring programs, and educational resources.
Onboarding interactive walkthrough elements used by FLOWN implemented using Product Fruits:
- Personalized welcome
- Quick-start options
- Guided product tour
- Progress tracking
- Gamification 👾
- Self-service support
Let’s break down FLOWN’s onboarding software walkthrough step by step:
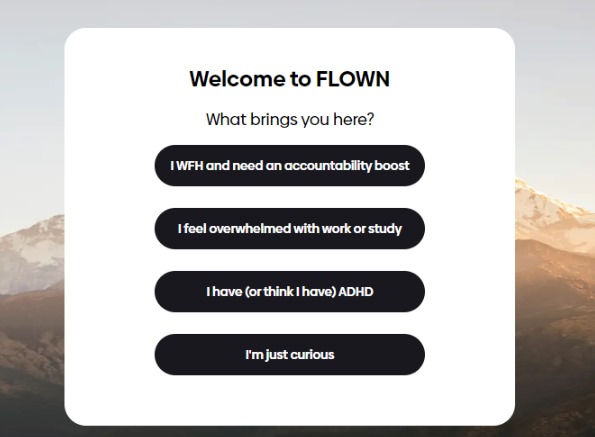
Step 1: Welcome card and quick start options
When new users sign up, a modal card prompts them to select their reason for joining (e.g., ADHD, concentration issues, curiosity). This information helps tailor the user experience by presenting relevant sessions and content, including videos and articles.
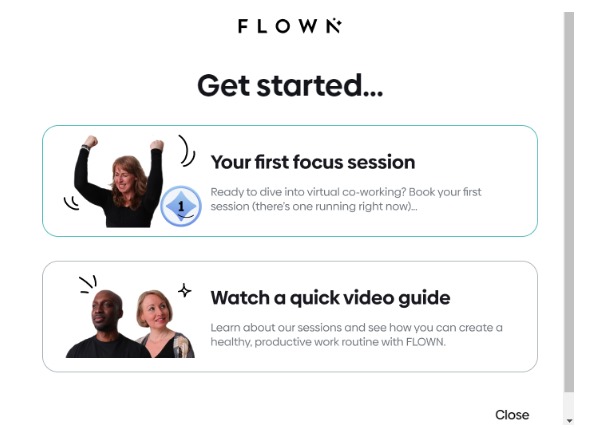
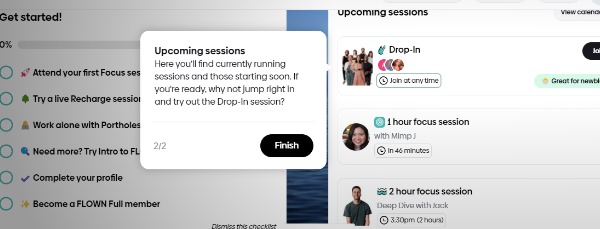
Next, FLOWN displays a tailored “Get Started” screen using Product Fruits’ tour cards feature. This screen offers users two focused options:
- Book their first focus session, noting that one is currently in progress.
- View a brief video guide on sessions and establishing a productive work routine.
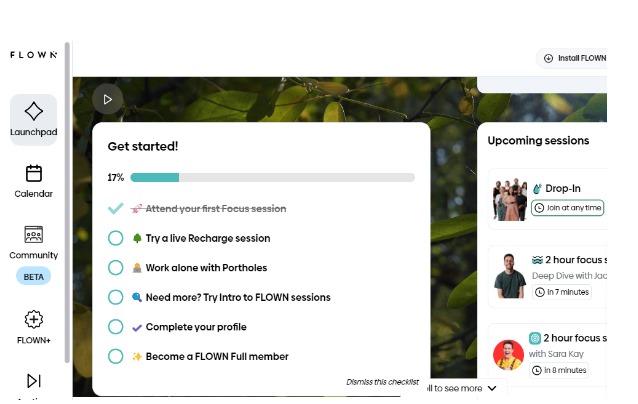
Step 2: Guided Tours and Progress Tracking
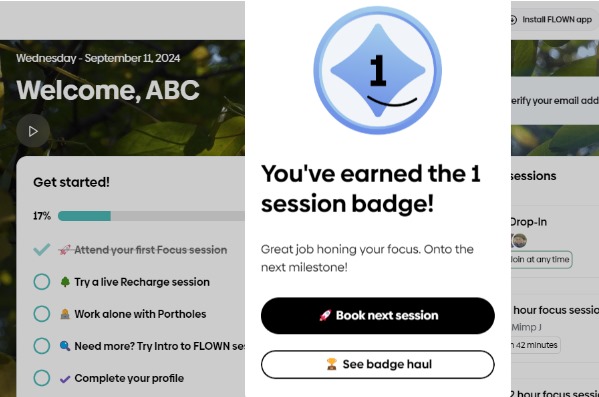
FLOWN implements embedded user onboarding checklists to steer users through their initial platform experience. A progress bar atop the checklist visually represents how far users have advanced in their onboarding journey.
This checklist proves particularly useful as FLOWN has observed that users participating in 4 or more sessions are more inclined to convert into paying customers.
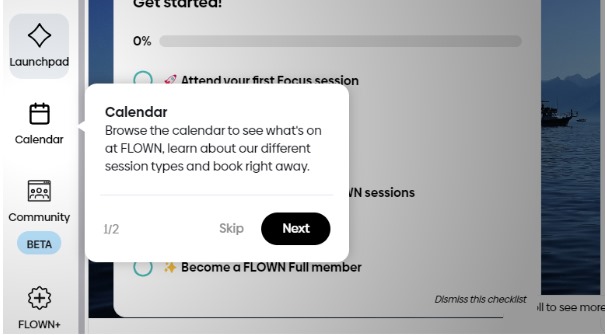
Step 3: Platform Navigation Tour
FLOWN uses Product Fruits’ tooltip features to offer contextual information about platform features, such as the Calendar. This “just-in-time” learning approach reduces new users’ cognitive load, helping them navigate the platform more efficiently.
Step 4: Gamification
FLOWN employs gamification elements to enhance engagement and retain users by rewarding increased activity. Upon completing their first session, users receive a message saying, “You’ve earned the 1 session badge!” and the incentive to book their next session or explore their badge collection.
This gamified approach, powered by Product Fruits, offers users an engaging way to explore the platform further and consider upgrading their membership.
Step 5: Self-service support
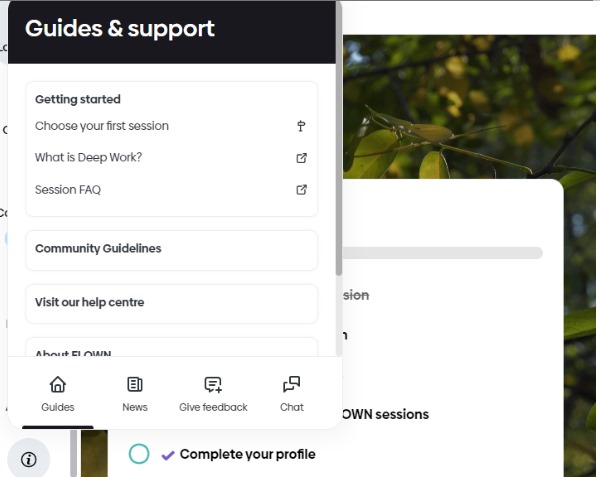
The platform has a comprehensive “Guides and support” section accessible through a life ring button (another Product Fruits feature). This 24*7 in-app help center reduces support tickets and helps in navigation.
All users can access the self-service approach, while only specific user segments see some targeted tours.
2. Interactive software walkthrough by Notion
Notion is a versatile productivity and collaboration tool that combines note-taking, project management, and team collaboration features into a single platform with exceptional aesthetics✨.
It uses several onboarding elements in its software walkthrough:
- User segmentation
- Personalization
- Interactive checklists
- Guided tour
Let’s break down Notion’s onboarding flow step by step:
Step 1: User Segmentation
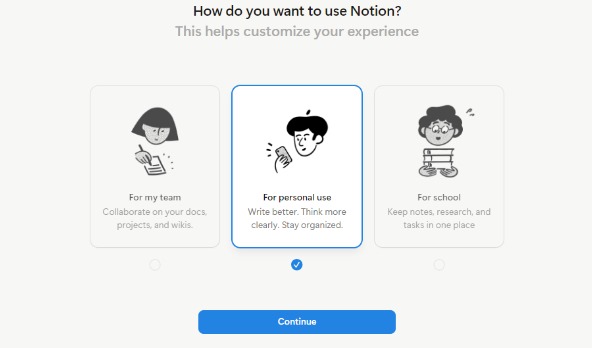
Notion asks, “How do you want to use Notion?” This question guides users to the setup that best suits their needs—be it for personal projects, team collaboration, or academic use.
The interface is clean and intuitive, offering clear options with concise descriptions that facilitate easy decision-making for users.
Step 2: Interest Tagging
Users encounter a multi-select interface featuring various tags. The prompt “What’s on your mind?” encourages users to select multiple areas of interest, such as project tracking or to-do lists.
By allowing users to choose multiple interests, Notion tailors the user experience, creating personalized pathways through the platform.
Step 3: Personalized Workspace
Based on the user’s selections, Notion creates a customized workspace that includes:
- A sidebar for easy navigation
- A “Getting Started” guide
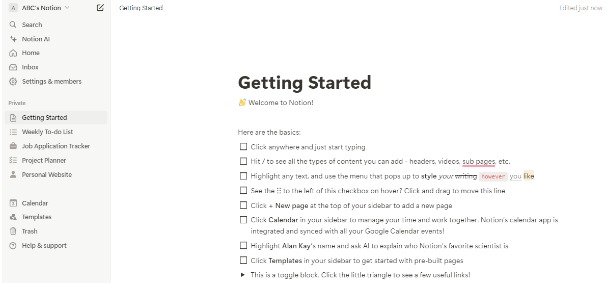
Step 4: Interactive Checklist
The “Getting Started” page features an interactive checklist guiding users through essential actions:
- Typing anywhere on the page
- Using keyboard shortcuts
- Exploring different content types
Step 5: Hands-on Learning
As users complete the checklist, the platform encourages direct interaction with its features, promoting practical learning.
3. Interactive software walkthrough by Canva
Canva is a graphic design platform that enables users to create visuals for various content assets, including social media posts, presentations, and marketing materials.
Canva’s onboarding process utilizes the following elements:
- User personalization
- Visual categorization
- Guided tour option
- Quick-start templates
Let’s examine Canva’s onboarding flow step by step:
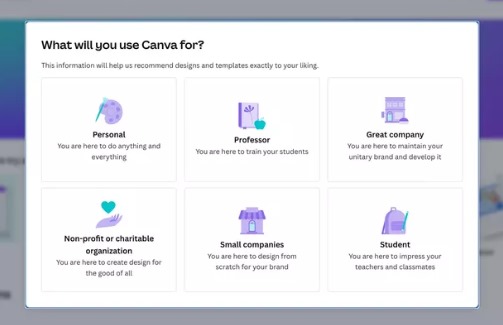
Step 1: Use Case Selection
Canva’s onboarding process begins with a personalization step: “What will you use Canva for?” This initial query sets the stage for a more tailored user experience. Users can choose from various options, including personal projects, professional needs, business, non-profit, small companies, or student work.
Each option features a concise description and a unique icon, helping users quickly identify their primary use case.
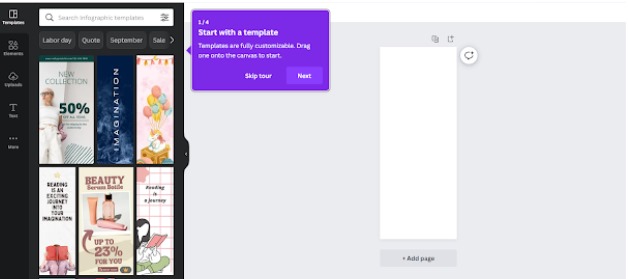
Step 2: Main Dashboard Introduction
After selecting their use case, users arrive at Canva’s main page. This page showcases:
- A left panel with ready-to-use designs
- An in-app guide on the right side
Step 3: Template Suggestion
The in-app guide encourages users to “Start with a template,” offering a quick way to begin creating.
Step 4: Flexible Learning Path
Users can choose between two options:
- Follow the guided product tour for a structured introduction
- Explore the platform independently
Step 5: Immediate Action
The dashboard empowers users to start creating right away by:
- Exploring designs tailored to their chosen use case
- Picking a template that suits their specific needs
4. Interactive software walkthrough by Slack
Slack is a messaging platform designed for team communication and collaboration in the workplace.
Slack’s onboarding process incorporates the following elements:
- Personalization
- Guided tours
- In-app tutorial
Let’s examine Slack’s onboarding flow step by step:
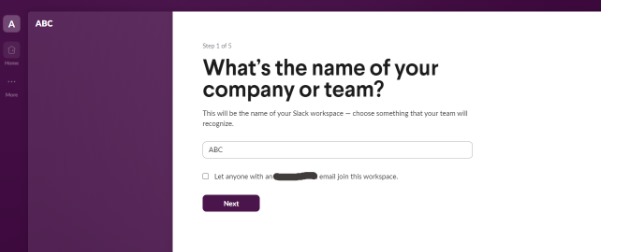
Step 1: Workspace Creation
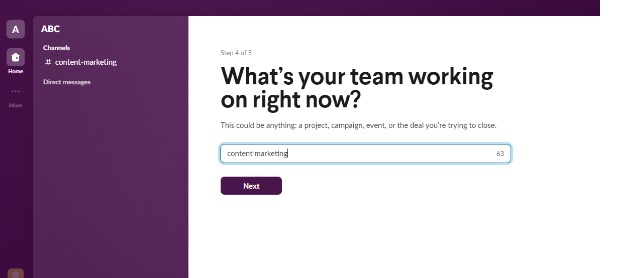
Slack starts the in-app customer journey by asking, “What’s your company or team name?” This question immediately personalizes the experience, giving users a sense of ownership over their new Slack workspace.
Step 2: Team Setup
Users are guided through a series of questions to set up their team. These questions cover essential topics such as team member invitations and ongoing projects.
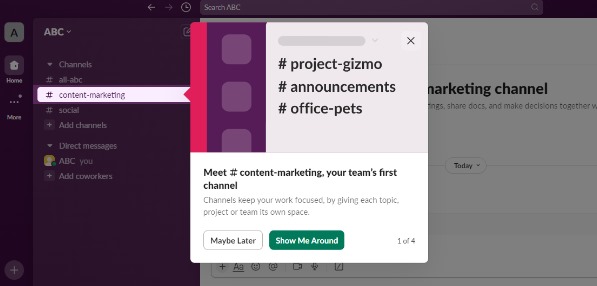
Step 3: Guided Product Tour
After the initial setup, Slack offers a guided tour of its core functionalities. This tour introduces users to key features, including creating channels, communicating with team members, and navigating the interface.
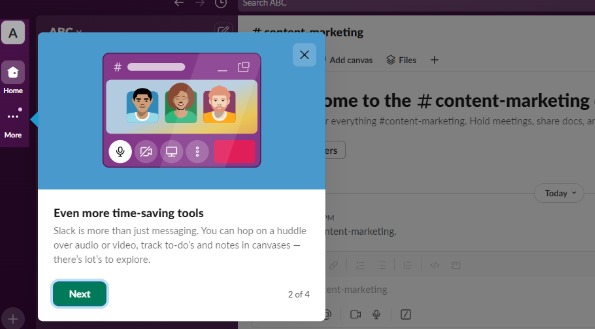
Step 4: In-app Tutorial
Slack employs tooltips throughout the onboarding process to acquaint users with its various features. These helpful prompts provide context and demonstrate how different aspects of the platform can enhance team communication and collaboration.
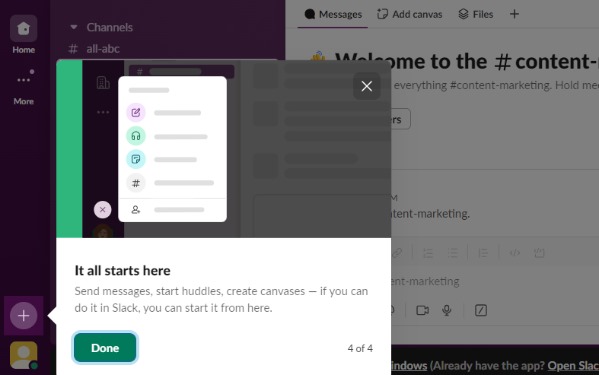
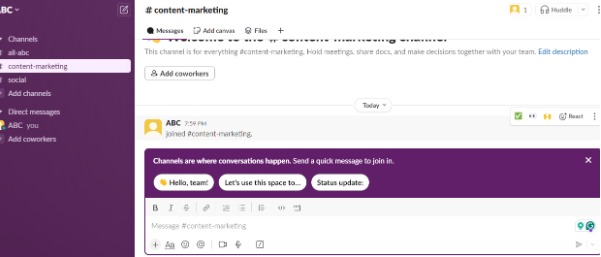
Step 5: Main Workspace Introduction
After completing the product tour, users are directed to their main workspace. Here, they can view their created channels (e.g., “#content-marketing”) and begin interacting with team members right away.
5. Interactive software walkthrough by Lucidchart
Lucidchart is an online diagramming tool that enables users to create various visual representations, from flowcharts to organizational charts.
Key onboarding elements include:
- Personalization
- Visual cues
- Guided tour/tutorial
- Contextual help
- Quick-start options
Let’s examine Lucidchart’s onboarding process step by step:
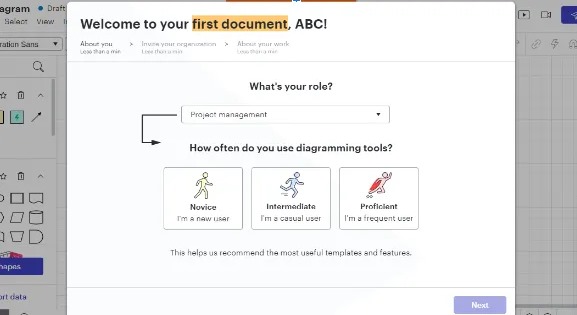
Step 1: User Profiling
Lucidchart begins by asking users about their roles and experience with diagramming tools. This personalization helps the platform understand each user’s background and needs. The interface presents options for selecting a user’s role (such as project management) and their diagramming proficiency level (novice, intermediate, or proficient).
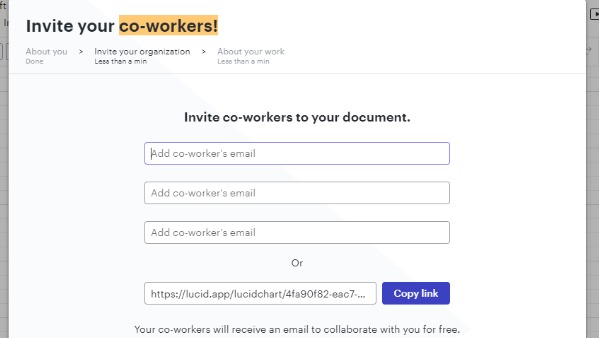
Step 2: Team Collaboration
The next screen emphasizes inviting coworkers to collaborate. Users can easily add their colleagues’ email addresses or share a document link. This step not only promotes teamwork but also encourages users to bring their entire team onto the platform, fostering a collaborative environment.
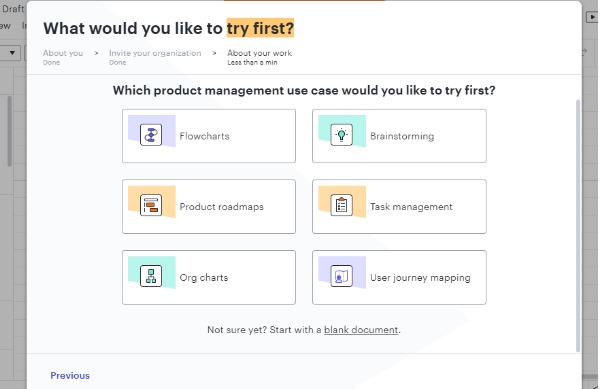
Step 3: Use Case Selection
Lucidchart then prompts users to choose their first task. It showcases various product management use cases—including flowcharts, brainstorming, product roadmaps, task management, org charts, and user journey mapping. This approach helps guide users to the most relevant features for their specific needs.
Step 4: Template Selection
After choosing a use case, Lucidchart offers a range of relevant templates. For instance, it displays templates for roadmaps and story mapping. These pre-designed layouts give users a quick starting point that they can easily customize.
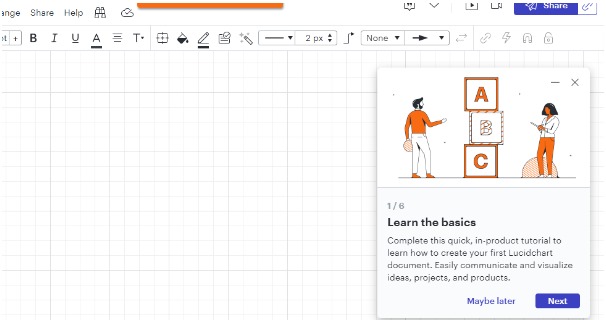
Step 5: Onboarding Tutorial
Finally, Lucidchart offers a brief tutorial using tooltips to help users learn the basics. The tutorial appears as a small window overlay on the main interface, allowing users to follow along while viewing the workspace. It guides users through creating their first diagram and familiarizes them with the tool’s key features.
6. Interactive software walkthrough by Figma
Figma is a collaborative interface design tool that enables teams to create, test, and ship designs from start to finish.
Onboarding elements used by Figma:
- User role selection
- Task prioritization
- Interactive preview
- Guided tour
- Contextual tooltips
- Sample projects
- In-app tutorial
Let’s break down Figma’s onboarding flow step by step:
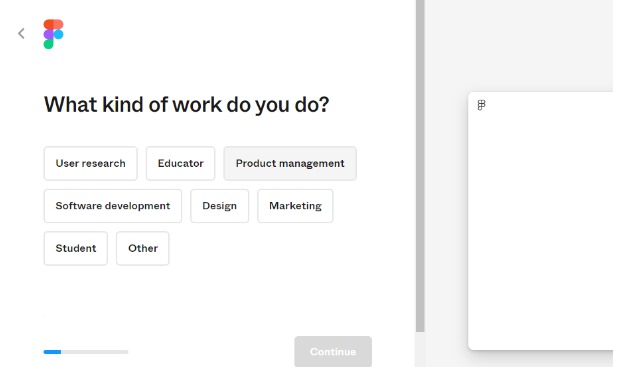
Step 1: Identifying the user role
Figma asks, “What kind of work do you do?” Users can select from options like User research, Educator, Product management, Software development, Design, Marketing, Student, or Other.
Figma adjusts the experience based on the selection to fit the user’s background.
Step 2: Task prioritization
Next, Figma asks, “What would you like to do first?” It presents options such as “Design with Figma,” “Whiteboard in FigJam,” and “Present with Figma Slides.” Each option comes with a brief description of its functionality. This step lets users jump directly into the most interesting task and provide immediate value.
Step 3: Interactive preview
As users select their preferred task, Figma displays an interactive preview of the interface on the right side of the screen. This gives users a glimpse of what they’ll be working with, helping to set expectations and build familiarity with the tool.
Step 4: Guided tour
Once users enter the main interface, Figma introduces key features through a guided tour. The tour starts with a tooltip explaining how to create a frame, a fundamental concept in Figma.
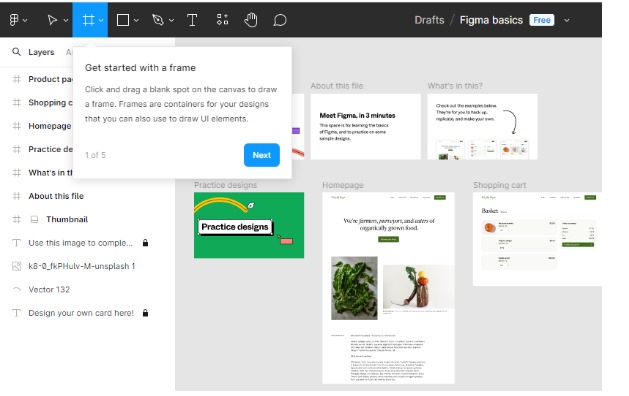
Step 5: Sample projects
Figma provides several sample projects that are visible in the workspace. These include examples like “Practice designs,” “Shopping cart,” and “Homepage.” These samples serve as inspiration and learning tools for new users.
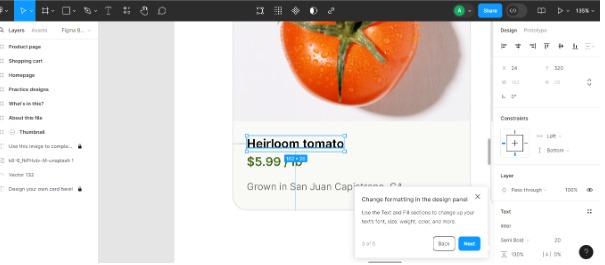
It also incorporated an interactive tutorial directly within the app. In the example shown, Figma guides users to edit text on an image of a tomato. The hands-on approach helps users learn by doing and directly interact with the tool’s features.
How do you find the right interactive walkthrough software?
Seeing these creative walkthrough examples probably has your mind buzzing with ideas for your product.
Choosing the right interactive walkthrough software can feel overwhelming, especially with many options. While it’s tempting to dive right into the most popular tools, it’s important to consider what fits your product’s unique needs and user experience goals.
1. Identify your goals
Start by mapping out your objectives in detail. Are you aiming to reduce customer support inquiries? Do you want to boost user engagement with specific features? Maybe you’re looking to improve overall user retention. Each goal might require different functionalities from your walkthrough software. For example, if reducing support tickets is your main aim, you’ll want software that excels at creating clear, step-by-step guides for common issues.
2. Check compatibility
Compatibility isn’t just about whether the software works with your current system – it’s about how well it integrates. Does it mesh seamlessly with your product’s interface? Can it access the necessary parts of your system to create relevant walkthroughs? Will it slow down your product or create any user experience issues? These are all questions to consider when evaluating compatibility.
3. Look at customization options
Customization goes beyond matching your brand colors. Can you adjust the tone and style of the guidance to match your brand voice? Can you create different types of walkthroughs for different user segments? Can you customize the triggers for when walkthroughs appear? The more flexible the customization options, the better you can tailor the experience to your users’ needs.
Many of the best walkthrough software, including Product Fruits, offer extensive customization features. It allows you to create walkthroughs that feel like a natural part of your product.
4. Assess ease of use
This factor has two sides: ease of use for your team creating the walkthroughs and ease of use for your end users. For your team, consider the learning curve. How long will it take for them to become proficient with the software? For end users, consider how smoothly the walkthroughs integrate into the user experience. Are they helpful without being intrusive?
5. Consider multi-language support
If you serve a global audience, multi-language support is a must. But it isn’t limited to translation. Does the software account for differences in reading direction (like right-to-left languages)? Can it handle character-based languages well? These details can make a big difference in user experience for international audiences.
6. Consider scalability
Your needs today might not be your needs tomorrow. Can the software handle a growing user base? Can it accommodate more complex walkthrough scenarios as your product evolves? Will it integrate well with other tools you might adopt in the future? Choosing software with room to grow can save you the headache of switching systems.
For instance, Product Fruits is built to scale. It offers adaptable features for both simple onboarding and advanced, targeted guides.
7. Read reviews and ask for demos
Don’t just take the vendor’s word for it. Seek out reviews from businesses similar to yours. What was their experience like? Did the software deliver on its promises? When you get a demo, come prepared with specific scenarios you want to test. This hands-on experience can reveal much about how the software will work.
Most reputable walkthrough software providers, including Product Fruits, offer demos and have case studies available. This way, you can see real-world applications of their tools.
Related read: A Guide to Choosing the Right Product Tour Software
Bring interactive software walkthroughs to life with Product Fruits 🍇
Your interactive walkthroughs should help bridge the gap and guide users from confusion to clarity.
So start by thinking about your users and their pain points. What features confuse them the most? Take note of these insights – they’ll form the foundation of your strategy.
You don’t need a design team or coding skills to create a great walkthrough. Product walkthrough software like Product Fruits can handle the hard work for you. It’s an intuitive platform that lets you build product tours, tooltips, in-app help centers, and more without coding.
But also remember that software walkthroughs aren’t something you set up once and forget. It’s a dynamic part of your product. You can adjust your walkthroughs as you introduce new features or notice where users struggle. That’s the strength of Product Fruits – it lets you update and refine your guides easily so they grow with your product and meet users’ changing needs.